Strapi を開発環境と本番環境のDockerで動かしたい【その8】- Swagger の導入
今回は Strapi に Swagger のプラグインを追加していきます。
前回まではコチラ👇
Swagger とは
Swaggerは、OpenAPI を用いて RESTful API を設計する際に使用するツールセットのことです。Open APIという標準フォーマットに則ってAPIを実装することができます。
Starpi で用意されている Swagger のプラグインは、APIの仕様書を作成する Swagger UI になります。
開発環境で Swagger をインストールする
基本的には【その6】- プラグインの追加と同様の方法で導入します。
http://localhost:1337/admin/marketplace
Swaggerを検索してみつけます。
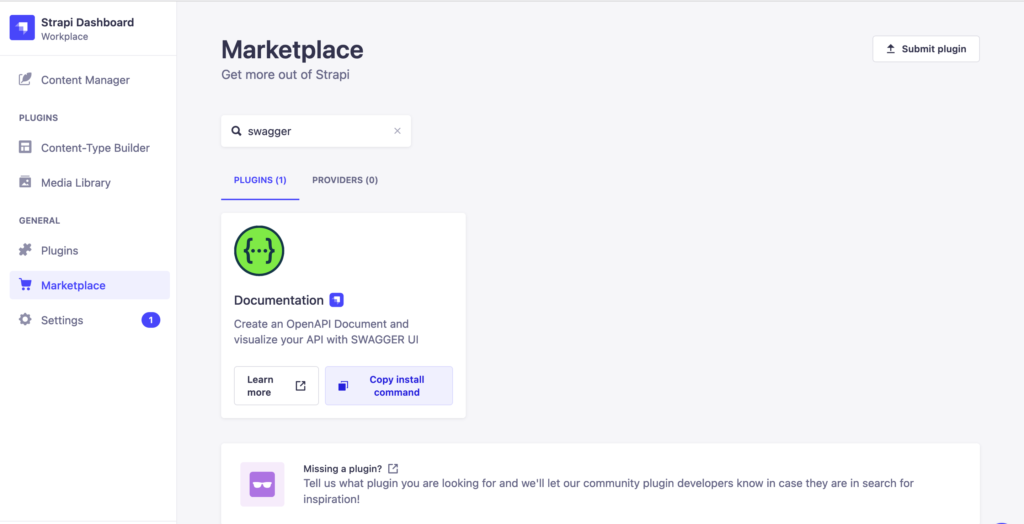
Swagger Documentationは Strapi 公式が提供しているプラグインになります。
Swagger Documentation プラグインのドキュメントをみながらインストールします。
# 作業ディレクトリに移動する
$ cd ~/StrapiProjects/donuts-strapi

# コンテナが起動している場合は止めておく
$ docker compose -f docker-compose.dev.yml down

# プラグインのインストールを行う
$ yarn add @strapi/plugin-documentation
インストールが完了したらコンテナを起動します。
# 作業ディレクトリに移動する
$ cd ~/StrapiProjects/donuts-strapi

# イメージの作成
$ docker compose -f docker-compose.dev.yml build

# コンテナの起動
$ docker compose -f docker-compose.dev.yml up -d
プラグインのインストール後にコンテナを起動してgit statusをして差分を見てみます。

srcディレクトリに各 Content-Type ごとにdocumentationsが生成されていることがわかります。
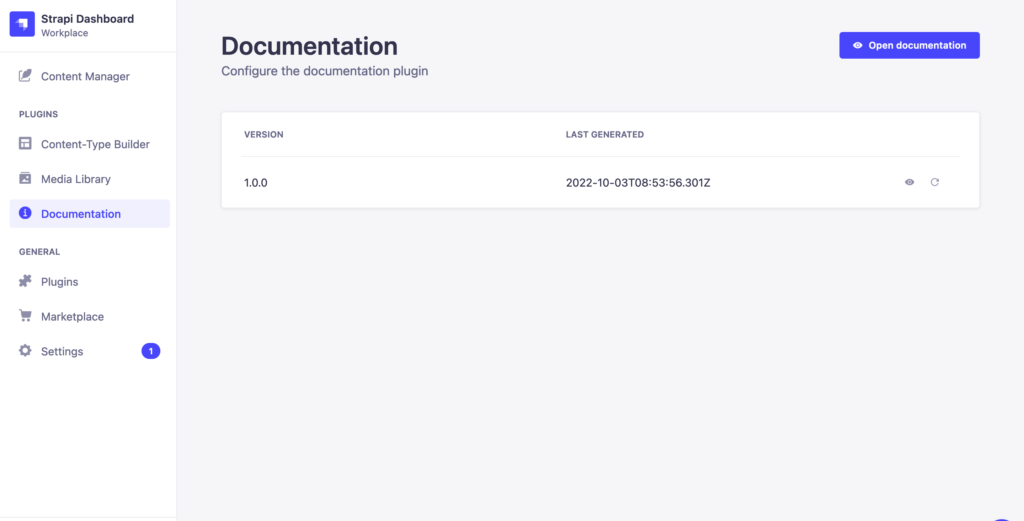
http://localhost:1337/admin/ にアクセスするとDocumentationという項目が追加されています。
生成されたファイルの確認ができたら、ステージング環境へプッシュしておきます。
ステージング環境で実行してみる
Swagger をステージング環境で見てみます。
GitHub のリポジトリにプッシュしてステージング環境にデプロイしておきます。
ステージング環境の Strapi の管理画面を開き、右上のOpen documentationより Swagger UI を開きます。
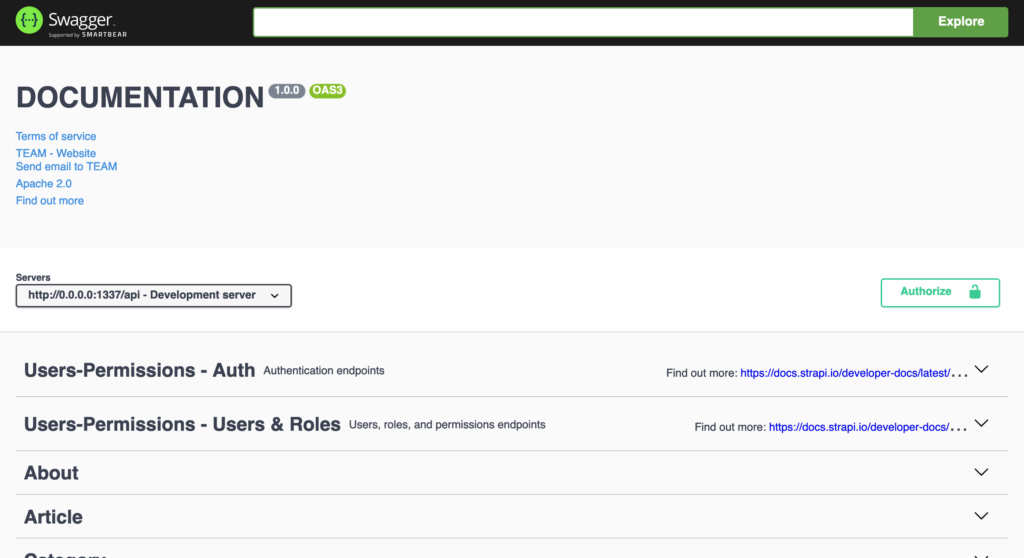
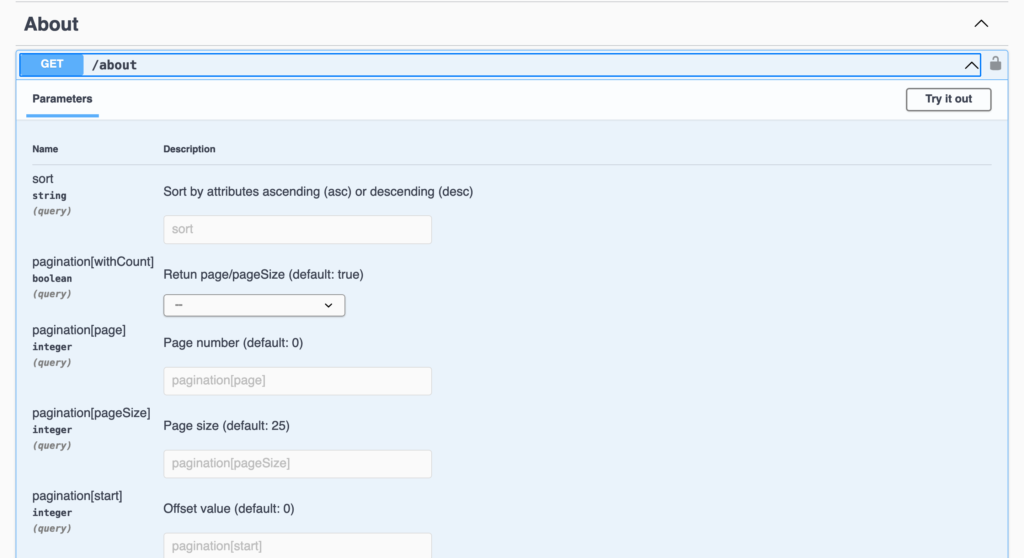
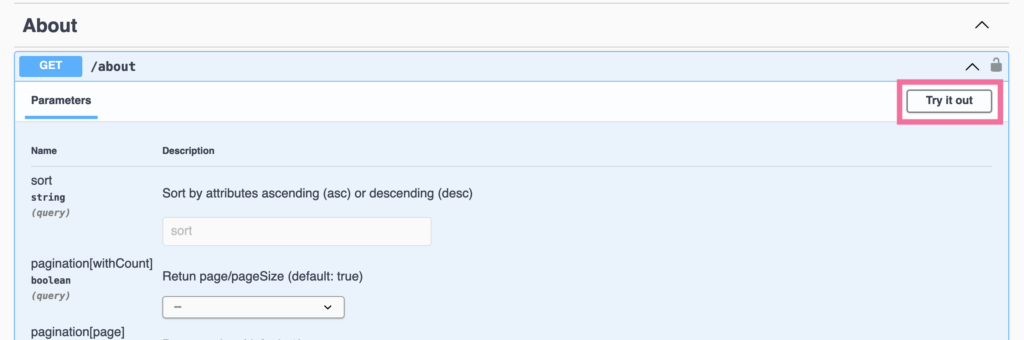
AboutのGETを開きます。
Parametersでは、設定できるパラメータが表示されます。
Responseでは、APIを叩いた時にどのようなレスポンスが返ってくるかが表示されます。
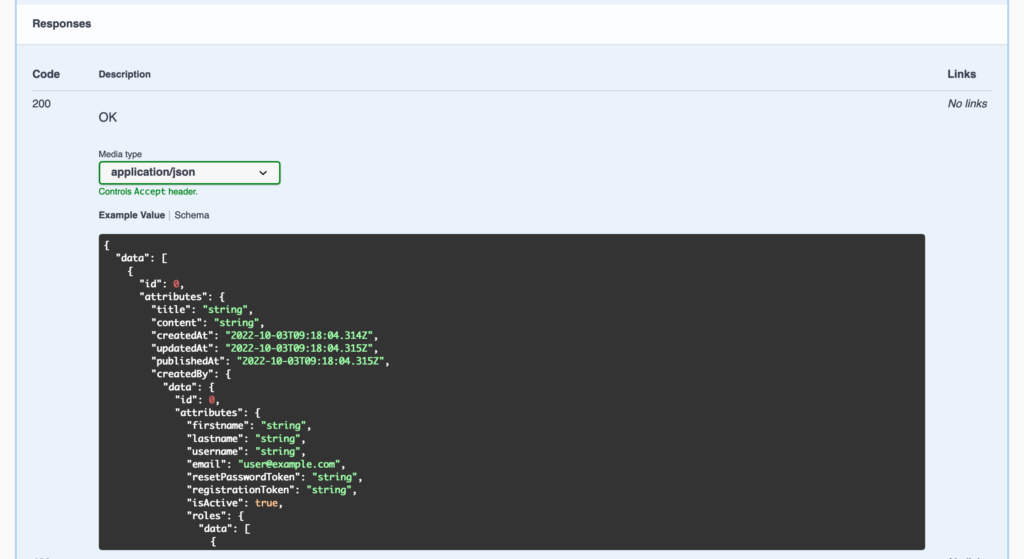
{
  "data": [
    {
      "id": 0,
      "attributes": {
        "title": "string",
        "content": "string",
        "createdAt": "2022-10-03T09:18:04.314Z",
        "updatedAt": "2022-10-03T09:18:04.315Z",
        "publishedAt": "2022-10-03T09:18:04.315Z",
        "createdBy": {
          "data": {
            "id": 0,
            "attributes": {
              "firstname": "string",
              "lastname": "string",
              "username": "string",
              "email": "user@example.com",
              "resetPasswordToken": "string",
              "registrationToken": "string",
              "isActive": true,
              "roles": {
                "data": [
                  {
                    "id": 0,
                    "attributes": {
                      "name": "string",
                      "code": "string",
                      "description": "string",
                      "users": {
                        "data": [
                          {
                            "id": 0,
                            "attributes": {}
                          }
                        ]
                      },
                      "permissions": {
                        "data": [
                          {
                            "id": 0,
                            "attributes": {
                              "action": "string",
                              "subject": "string",
                              "properties": "string",
                              "conditions": "string",
                              "role": {
                                "data": {
                                  "id": 0,
                                  "attributes": {}
                                }
                              },
                              "createdAt": "2022-10-03T09:18:04.315Z",
                              "updatedAt": "2022-10-03T09:18:04.315Z",
                              "createdBy": {
                                "data": {
                                  "id": 0,
                                  "attributes": {}
                                }
                              },
                              "updatedBy": {
                                "data": {
                                  "id": 0,
                                  "attributes": {}
                                }
                              }
                            }
                          }
                        ]
                      },
                      "createdAt": "2022-10-03T09:18:04.315Z",
                      "updatedAt": "2022-10-03T09:18:04.315Z",
                      "createdBy": {
                        "data": {
                          "id": 0,
                          "attributes": {}
                        }
                      },
                      "updatedBy": {
                        "data": {
                          "id": 0,
                          "attributes": {}
                        }
                      }
                    }
                  }
                ]
              },
              "blocked": true,
              "preferedLanguage": "string",
              "createdAt": "2022-10-03T09:18:04.315Z",
              "updatedAt": "2022-10-03T09:18:04.315Z",
              "createdBy": {
                "data": {
                  "id": 0,
                  "attributes": {}
                }
              },
              "updatedBy": {
                "data": {
                  "id": 0,
                  "attributes": {}
                }
              }
            }
          }
        },
        "updatedBy": {
          "data": {
            "id": 0,
            "attributes": {}
          }
        }
      }
    }
  ],
  "meta": {
    "pagination": {
      "page": 0,
      "pageSize": 25,
      "pageCount": 1,
      "total": 0
    }
  }
}
try it outを選択して、パラメータを特に変えずにexecuteを行ってみます。
上記を実行するとエラーが出ました。
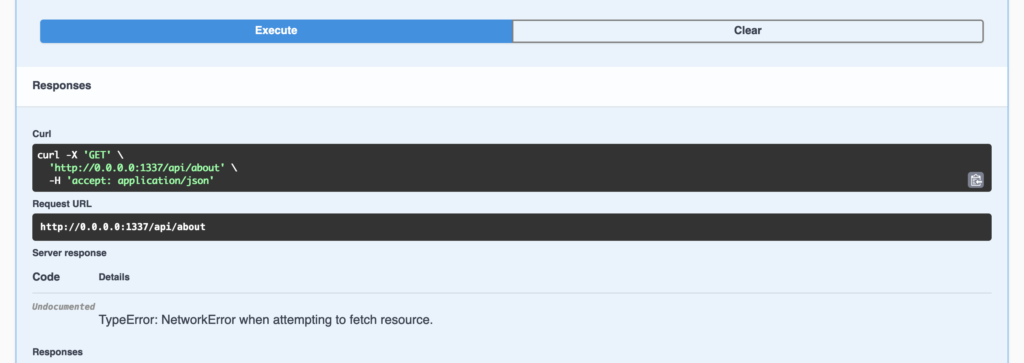
TypeError: NetworkError when attempting to fetch resource.
ブラウザ(Firefox)でのエラーも確認します。
![]()
これは Content Security Policy(CSP) の設定問題のようです。CSP は、コンテンツの提供元や取得方法を制限することで、さまざまなセキュリティから守る役割があります。
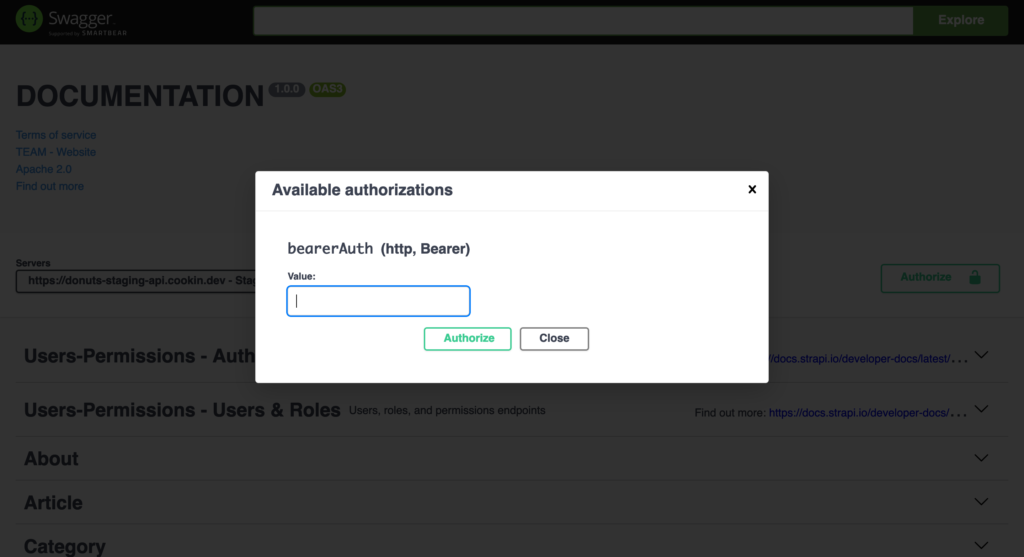
Try it outを使う時にはまずAuthorizeより認証する必要があります。

前回の記事の STEP.5 で作成した API Token を設定します。
ステージング環境でも、リクエストURLがhttp://0.0.0.0:1337/api/aboutのようになってしまっています。
これを修正するために Swagger の設定ファイルを追加します。
API Documentation – Strapi Developer Docsを参考に作成します。
src/extensions/documentation/config/settings.jsonを作成します。
# 作業ディレクトリに移動する
$ cd ~/StrapiProjects/donuts-strapi

$ mkdir src/extensions/documentation/config

$ touch src/extensions/documentation/config/settings.json
settings.json の書き方はSwagger Specificationを参考にします。
{
  "openapi": "3.0.0",
  "info": {
    "version": "1.0.0",
    "title": "DOCUMENTATION",
    "description": "",
    "termsOfService": "YOUR_TERMS_OF_SERVICE_URL",
    "contact": {
      "name": "TEAM",
      "email": "",
      "url": "cookin.dev"
    },
    "license": {
      "name": "Apache 2.0",
      "url": "https://www.apache.org/licenses/LICENSE-2.0.html"
    }
  },
  "x-strapi-config": {
    "path": "/documentation",
    "showGeneratedFiles": true,
    "pluginsForWhichToGenerateDoc": []
  },
  "servers": [
    {
      "url": "http://localhost:1337",
      "description": "Development server",
      "basePath": {
        "default": "api"
      }
    },
    {
      "url": "https://donuts-staging-api.cookin.dev/api",
      "description": "Staging server",
      "basePath": {
        "default": "api"
      }
    },
    {
      "url": "https://donuts-api.cookin.dev/api",
      "description": "Production server",
      "basePath": {
        "default": "api"
      }
    }
  ],
  "externalDocs": {
    "description": "Find out more",
    "url": "https://strapi.io/documentation/"
  },
  "security": [
    {
      "bearerAuth": []
    }
  ],
  "paths": {},
  "tags": [],
  "components": {}
}
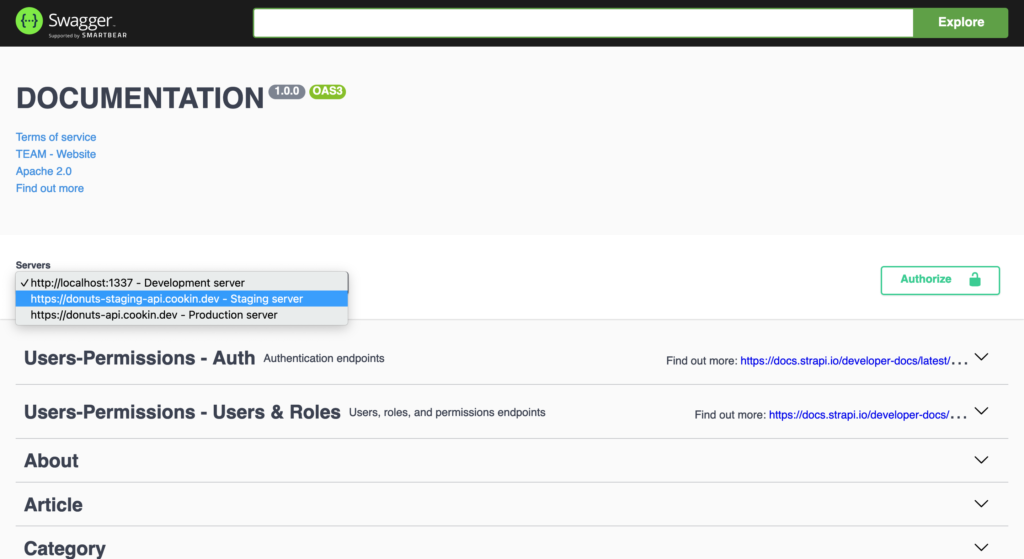
設定を追加したら、再度ビルドして実行して、Swagger UI にアクセスすると以下のようにServersに追加されました。
上記2つのメモを対応した後に再度Try it outよりexecuteを実行したところ無事に Success を返すようになりました。

STEP.3 で Swagger が正しく機能することが確認できました。
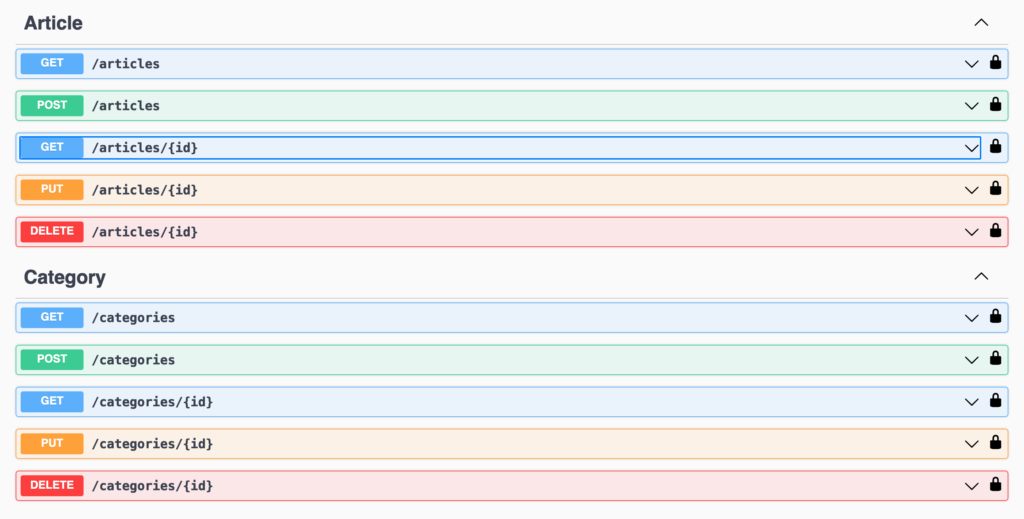
Swagger UI を利用するとエンドポイントの確認が簡単にできます。
Try it outを使うとcurlでどのように叩けばいいのかも表示されるので、とても便利です。
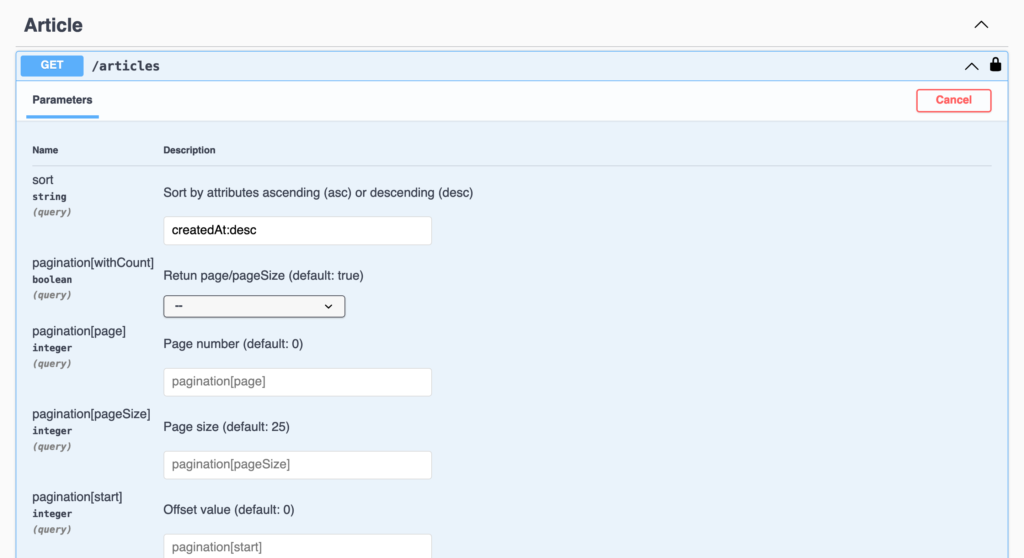
Try it outより、実際にパラメータを変更してレスポンスを見てみます。
最新のArticleを取得してみます。
sortにはソートに利用するフィールド:descまたはascを指定します。
pagination[limit]を1件にします。
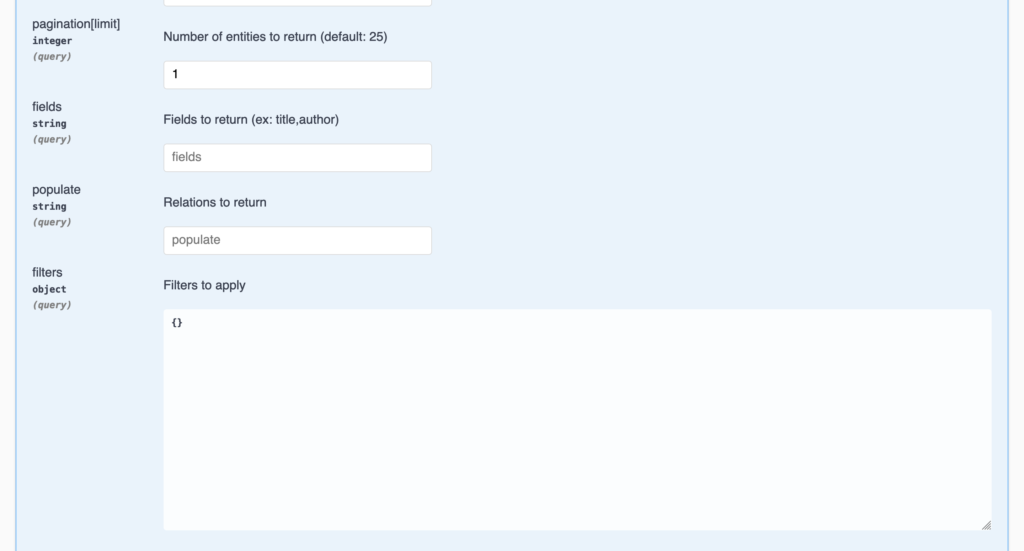
最後にexecuteを押して実行しましょう。
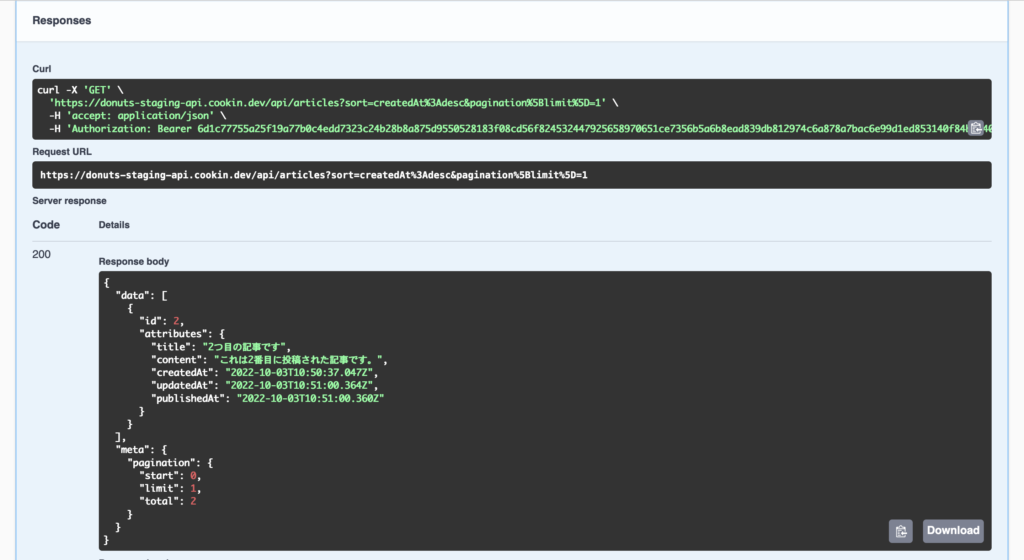
これで最新の記事が取得できています。
実際のリクエストURLはhttps://donuts-staging-api.cookin.dev/api/articles?sort=createdAt%3Adesc&pagination%5Blimit%5D=1になることがわかりました。
最後にPOSTを試してみます。
CategoryのPOST /categoriesからTry it outを選択します。(認証されていない場合にはページ上部のAuthorizeから認証しておきます。)
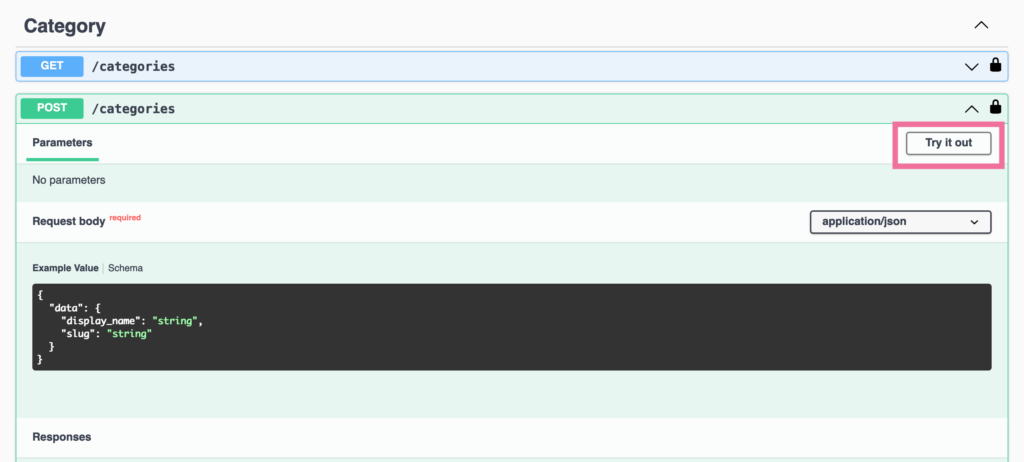
Request bodyに適当な値を入力してexecuteします。
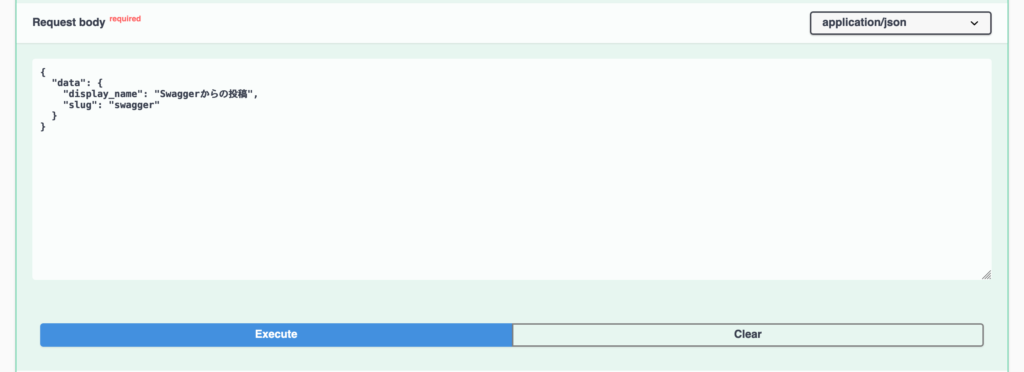
Responsesをみます。
一度実行してみたところ、以下のように403エラーになりました。
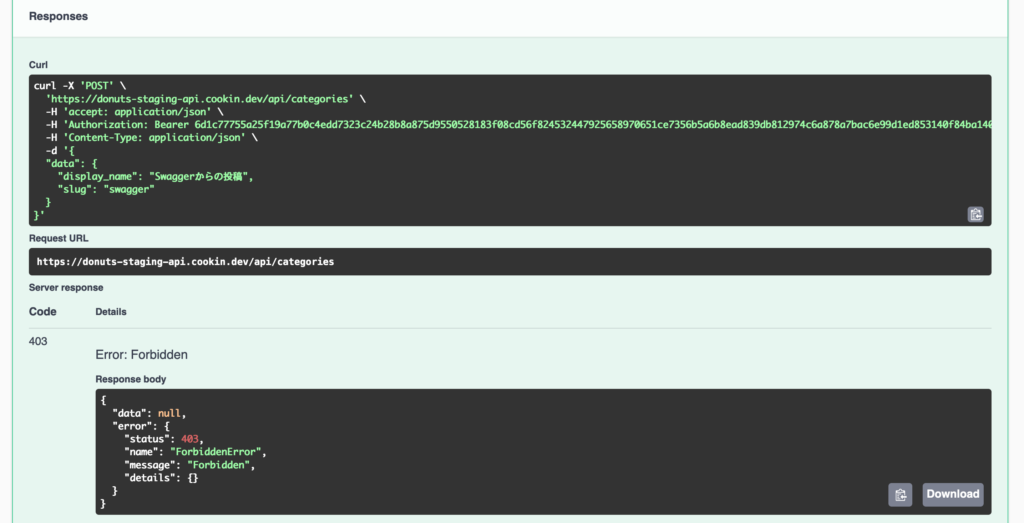
これはAPI TokenがRead onlyで作成されているためです。
改めて管理画面からFull accessに指定して API Token を作成します。
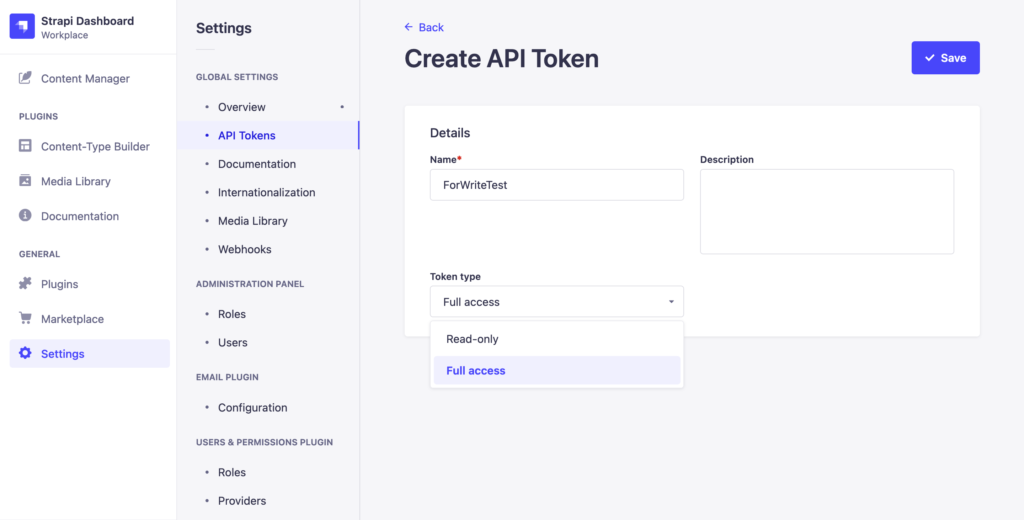
作成した API Token で Swagger UI のページ右上のAuthorizeよりログインして再度executeを実行します。
Full AccessのAPI Tokenを使って上記を実行すると、無事に200が返りました。
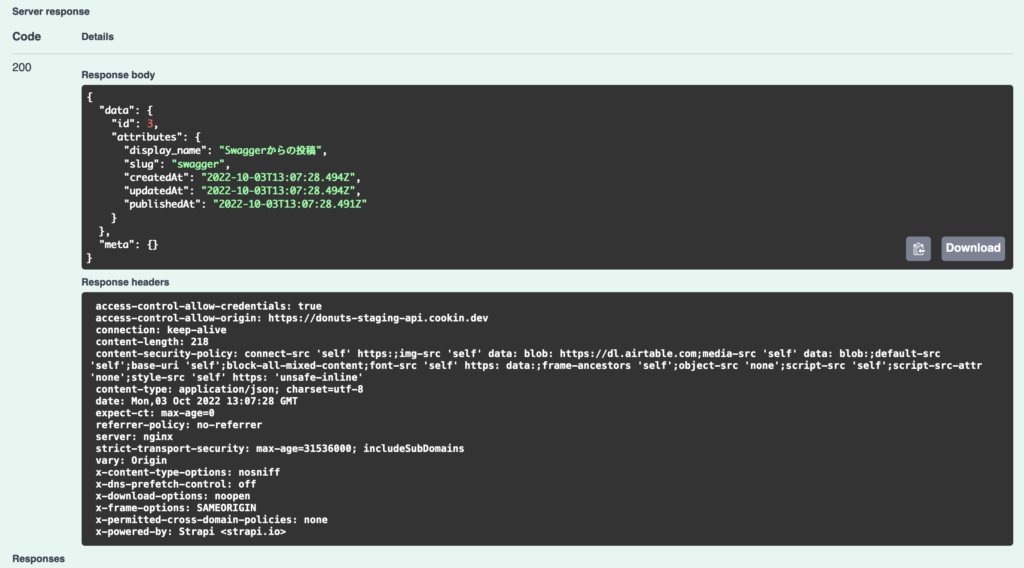
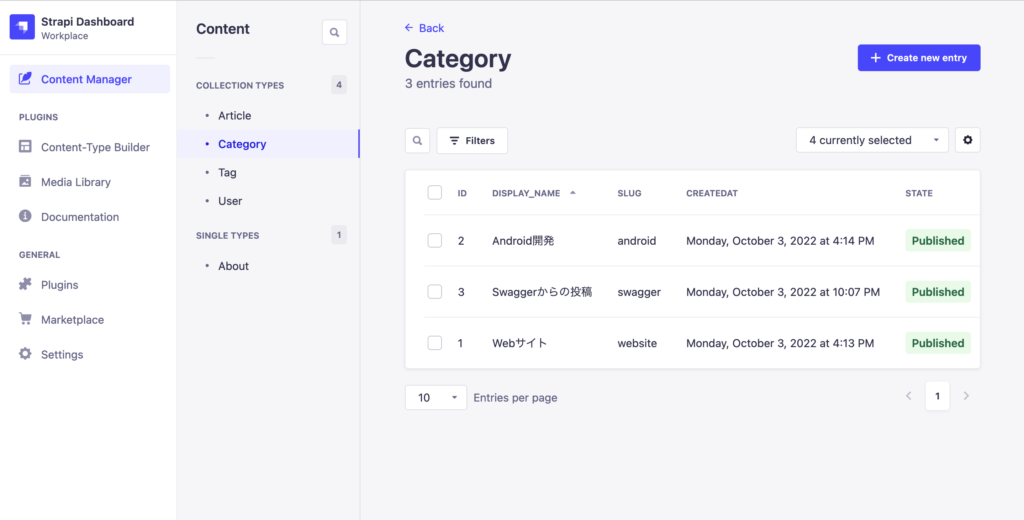
最後に Strapi の管理画面へ行き、CategoryにSwaggerからの投稿が追加されていることを確認します。
おわりに
これで Strapi をより API として使いやすくなりました。
本シリーズを書いている間に Strapi のバージョンがアップデートがされていました。
次回は、開発環境と本番環境の両方で Strapi のバージョンのアップデートを行ってみようと思います。